Progression. EVERY workout you do must be focused on progression. Simply doing the same thing every day doesn’t make you better, it keeps you the same. Doing the same weight, the same exercises, the same number of reps… every single time… gets you nowhere.
In fact, when I designed Core to Score, I based it on a solid progression. Designed to move you from mastery of the building block exercises to mastering the most advanced exercises.
Subtle.. yet, highly effective.
Progression = Progress. Want to get better at pushups? Master the ability to do 25 STRICT push-ups in a row. Then move from the standard pushup to a spiderman pushup.Want better balance? Master dumbbell curls, then move to single-leg dumbbell curls, then to the single-leg curl and press.
These are just examples of progressing your workouts to be more challenging. The more you challenge yourself, the better shape you will attain.
However, it is important we don’t rush ahead. We must Master the Basics.
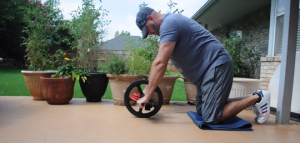
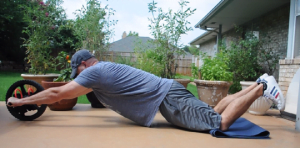
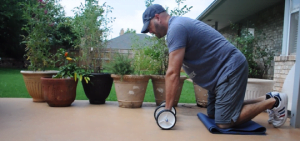
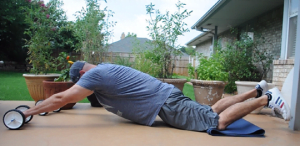
Here’s a progression working up to the ab wheel. I prefer to use two Ab Wheels at the same time. However, you can adapt if you just have the single wheel variety.
I designed this progression to be worked in over the course of three months. You will perform exercise 1 at the end of your existing workout (Core to Score or Shed Pounds to Shave Strokes) for month 1, 3 times per week. Then replace it with exercise 2 during month 2, and so on…
If you still have not mastered the exercise, keep it an additional week, for a max of 6 weeks. Following this timing will allow your body to adapt to the stress you are placing upon it.
We want adaptation. Once we adapt (get stronger), it’s time to move to the next progression.
Here’s a progression you can use to build your midline stabilization. Essentially, this will help us create torque and also aid in protecting our back during the recoil.
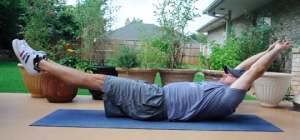
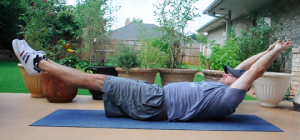
1. Hollow Body (month 1)
The hollow body is a lot like an upside down plank. It is a progression from the plank to a more challenging hold.
Week 1 – 30 seconds hold x 3 sets
Week 2 – 45 seconds hold x 3 sets
Week 3 – 1 minute hold x 3 sets
Week 4 – 1 minute 15 seconds hold x 3 sets
Description:
- Lie down flat on back and push belly button down towards the floor, your lower back should be touching the ground.
- Keep your abs and butt tight at all times, and with your arms pointed straight overhead and legs straight with toes pointed.
- Start slowly raising your legs and shoulders off the ground.
- Your head should come off the ground along with your shoulders, with your ears are glued between your shoulders.
- Stay tight with your abs and butt and find the lowest position you can have your arms and legs without them touching the ground AND without breaking your lower back (where it begins to arch off the ground).
- To develop your hollow, you can start with your arms and legs higher (1-2 feet high off the ground) and slowly build up strength until they can be held lower (just inches off the ground) without breaking the position.
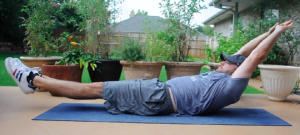
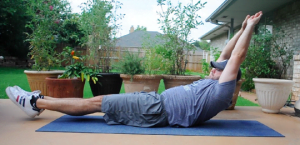
2. Hollow Body Rock (month 2)
Week 1 – 15 seconds rocks x 4 sets
Week 2 – 30 seconds rocks x 4 sets
Week 3 – 45 seconds rocks x 4 sets
Week 4 – 1 minute rocks x 4 sets
Description:
- Same as the hollow body except we add a rocking motion.
- Do not hinge at the hips or kick your legs for momentum.
- Maintain rigidity throughout motion.
- Maintain control throughout motion.
- This is not easy, but stick with it. If you can only move a few inches at first, so be it.
And finally, we work our way up to the ab wheel.
There are two different styles of ab wheels… the one-wheel and the two-wheel..
…and if you need instructions on how to build your own ab wheels, click here for full instructions.
3. Roll Out (month 3)
Week 1 – 8 roll outs x 3 sets
Week 2 – 10 roll outs x 3 sets
Week 3 – 12 roll outs x 3 sets
Week 4 – 15 roll outs x 3 sets
Description:
- Maintain the same form as the hollow body, starting out on your knees.
- Slowly extend the wheel in front of you as far as you can comfortably control it.
- Do not lose the hollow position.
- Do not go beyond the point where you can maintain strength and control.
Fairways and Greens,
P.S. What if there was a simple way to add 20 yards to your drive without wasting hundreds of dollars on new clubs, lessons, or the latest training gadget? Just a short and simple program you can do a few times a week in the comfort of your own home. If quickly adding power and distance to every club in your bag is of any interest to you at all, click here now for all the details.
